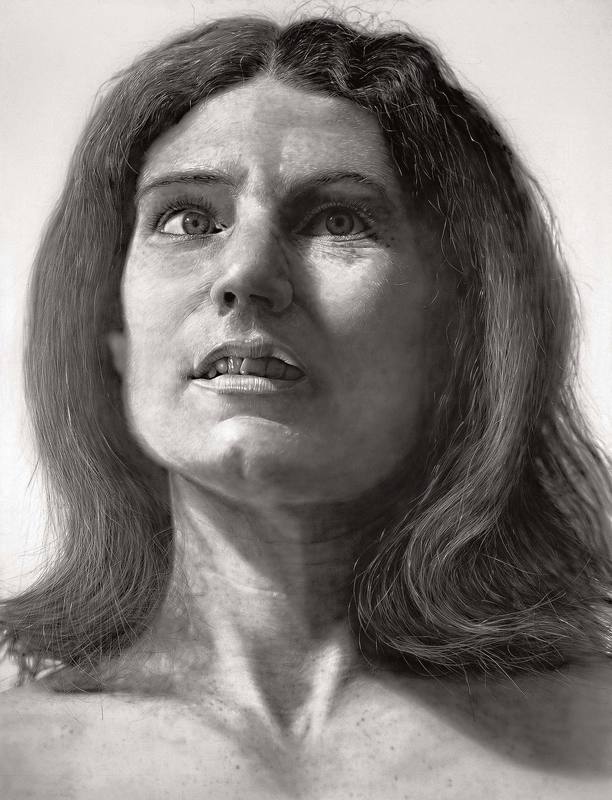
LARGE SELF PORTRAIT

|

|
Gabriell Suarez del Real
121.92cm x 91.44cm
Acrylic Paint on Canvas
November, 2017
121.92cm x 91.44cm
Acrylic Paint on Canvas
November, 2017
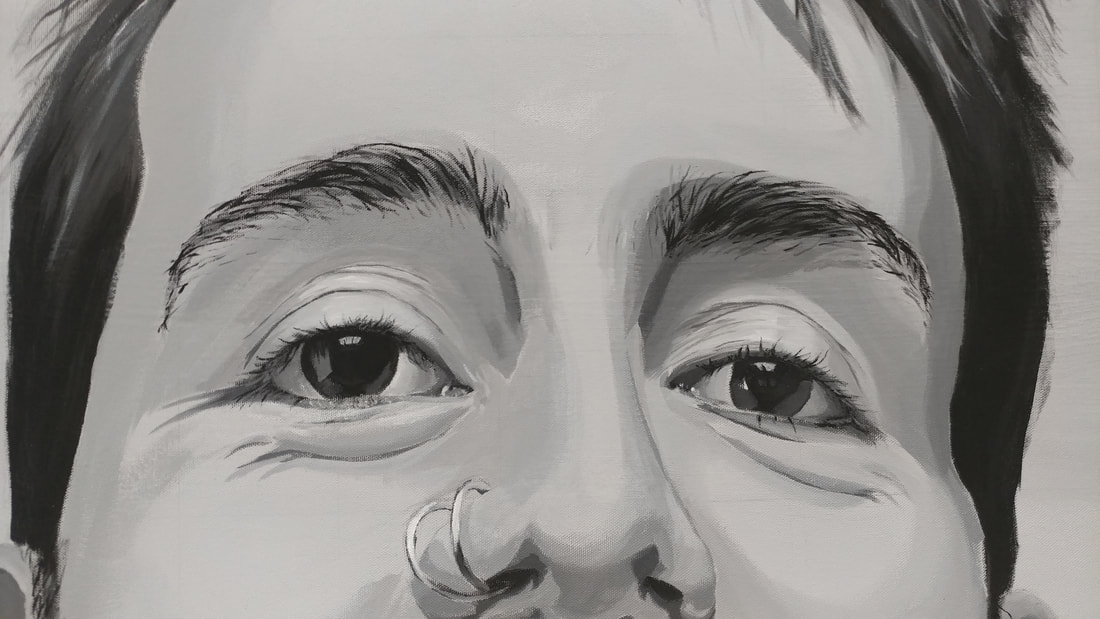
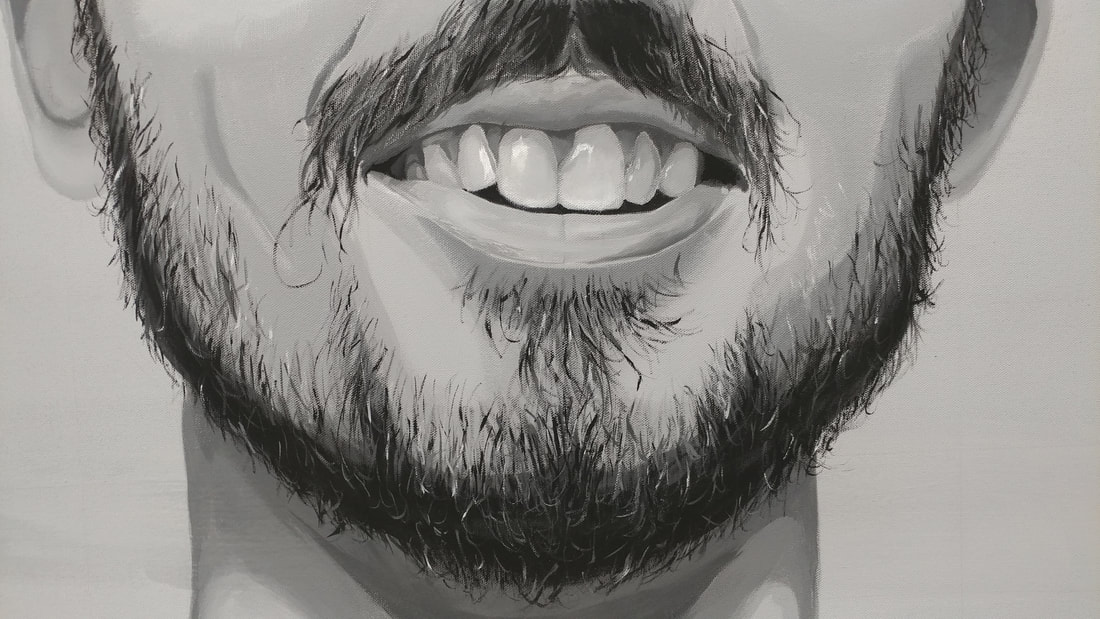
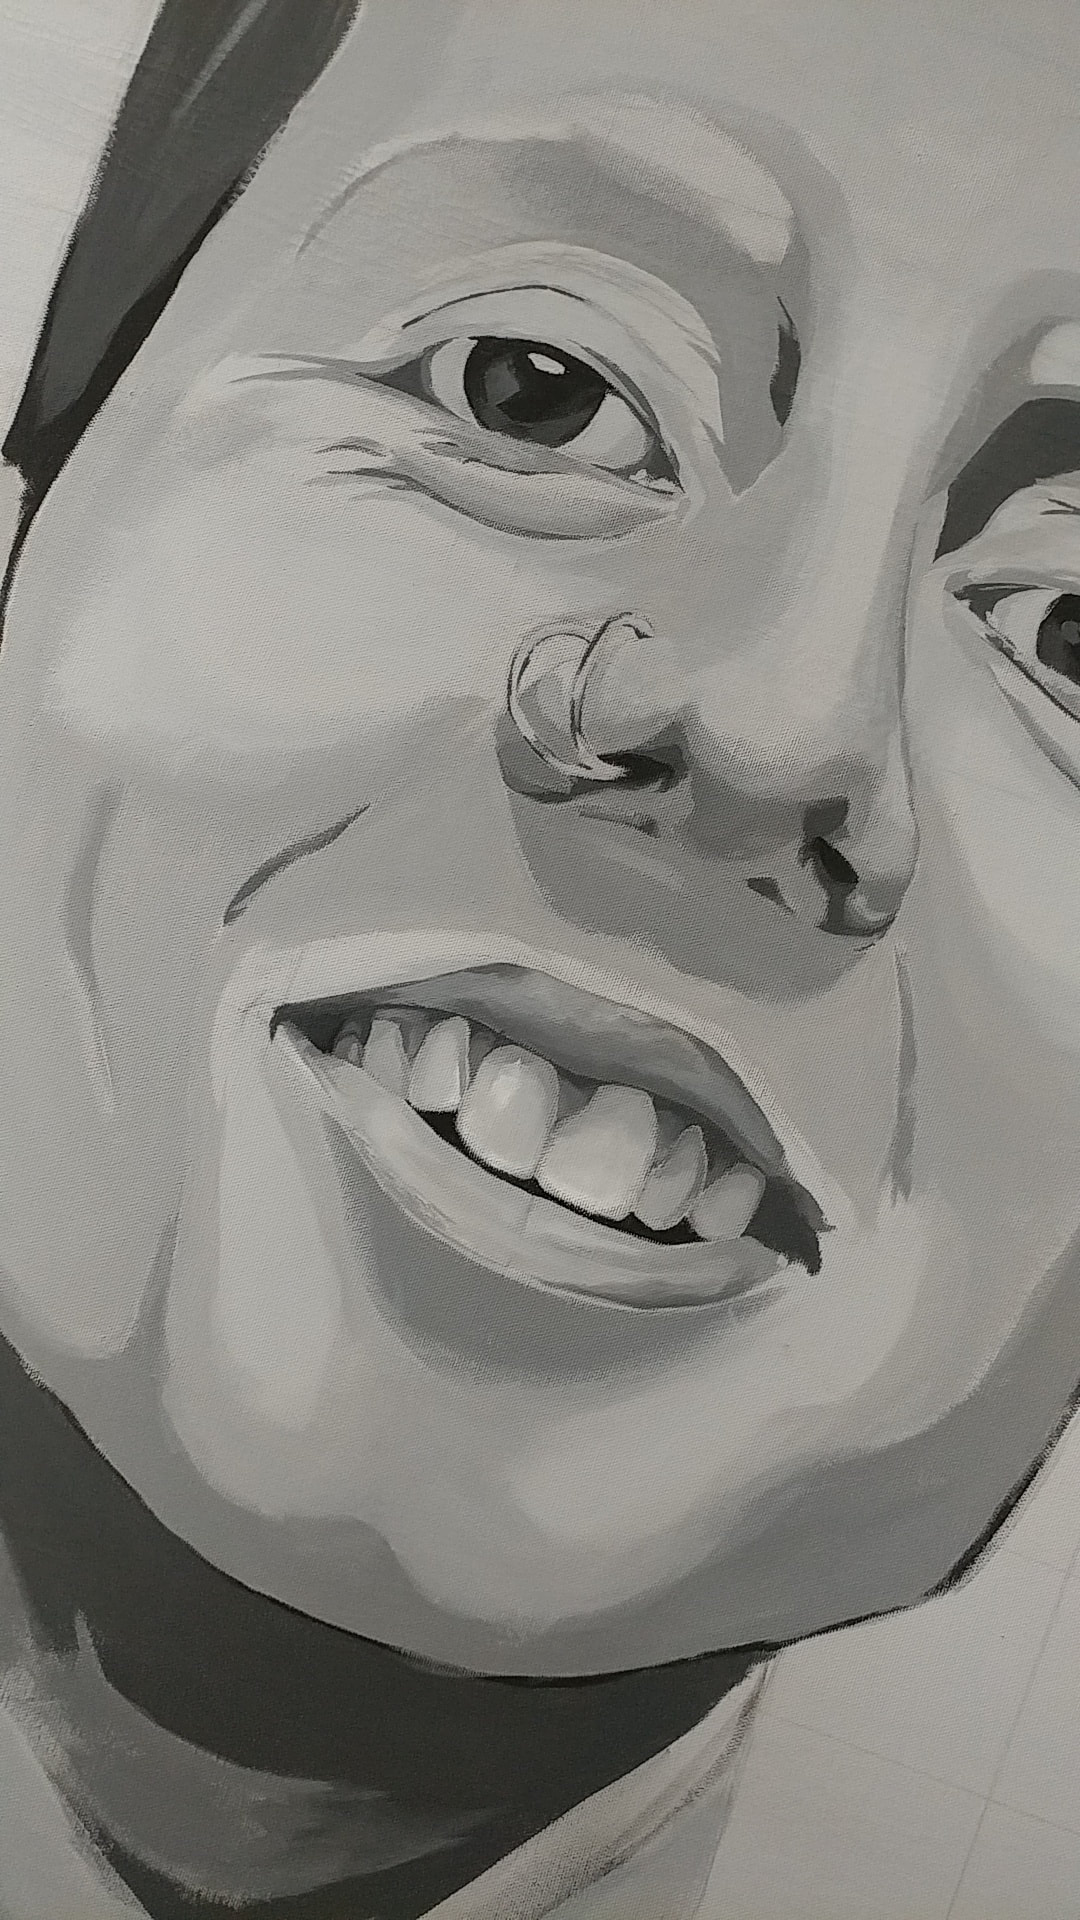
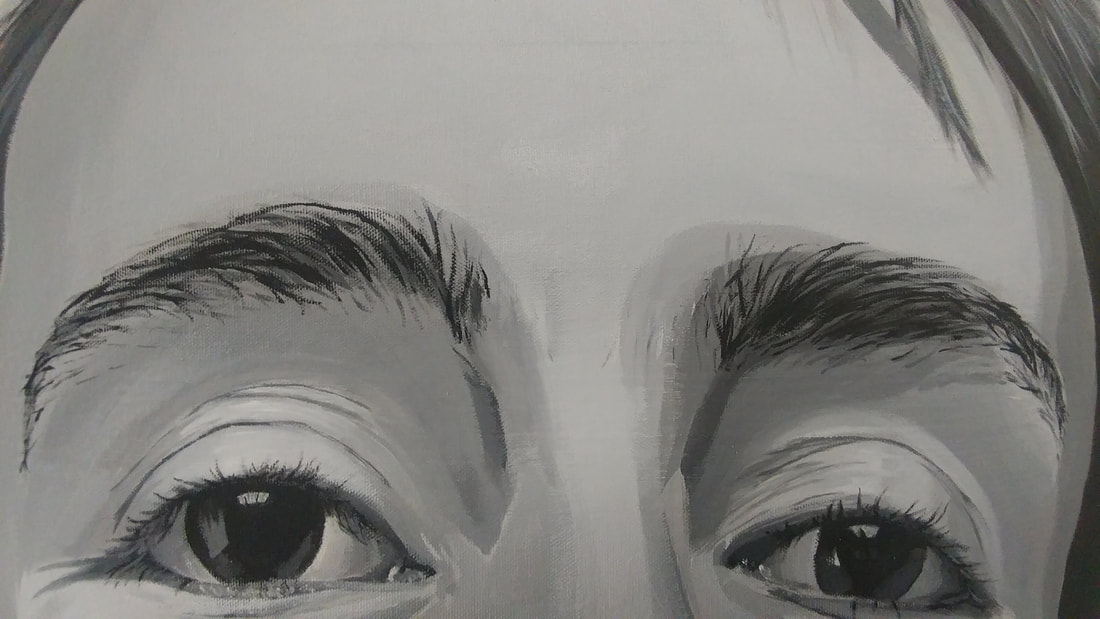
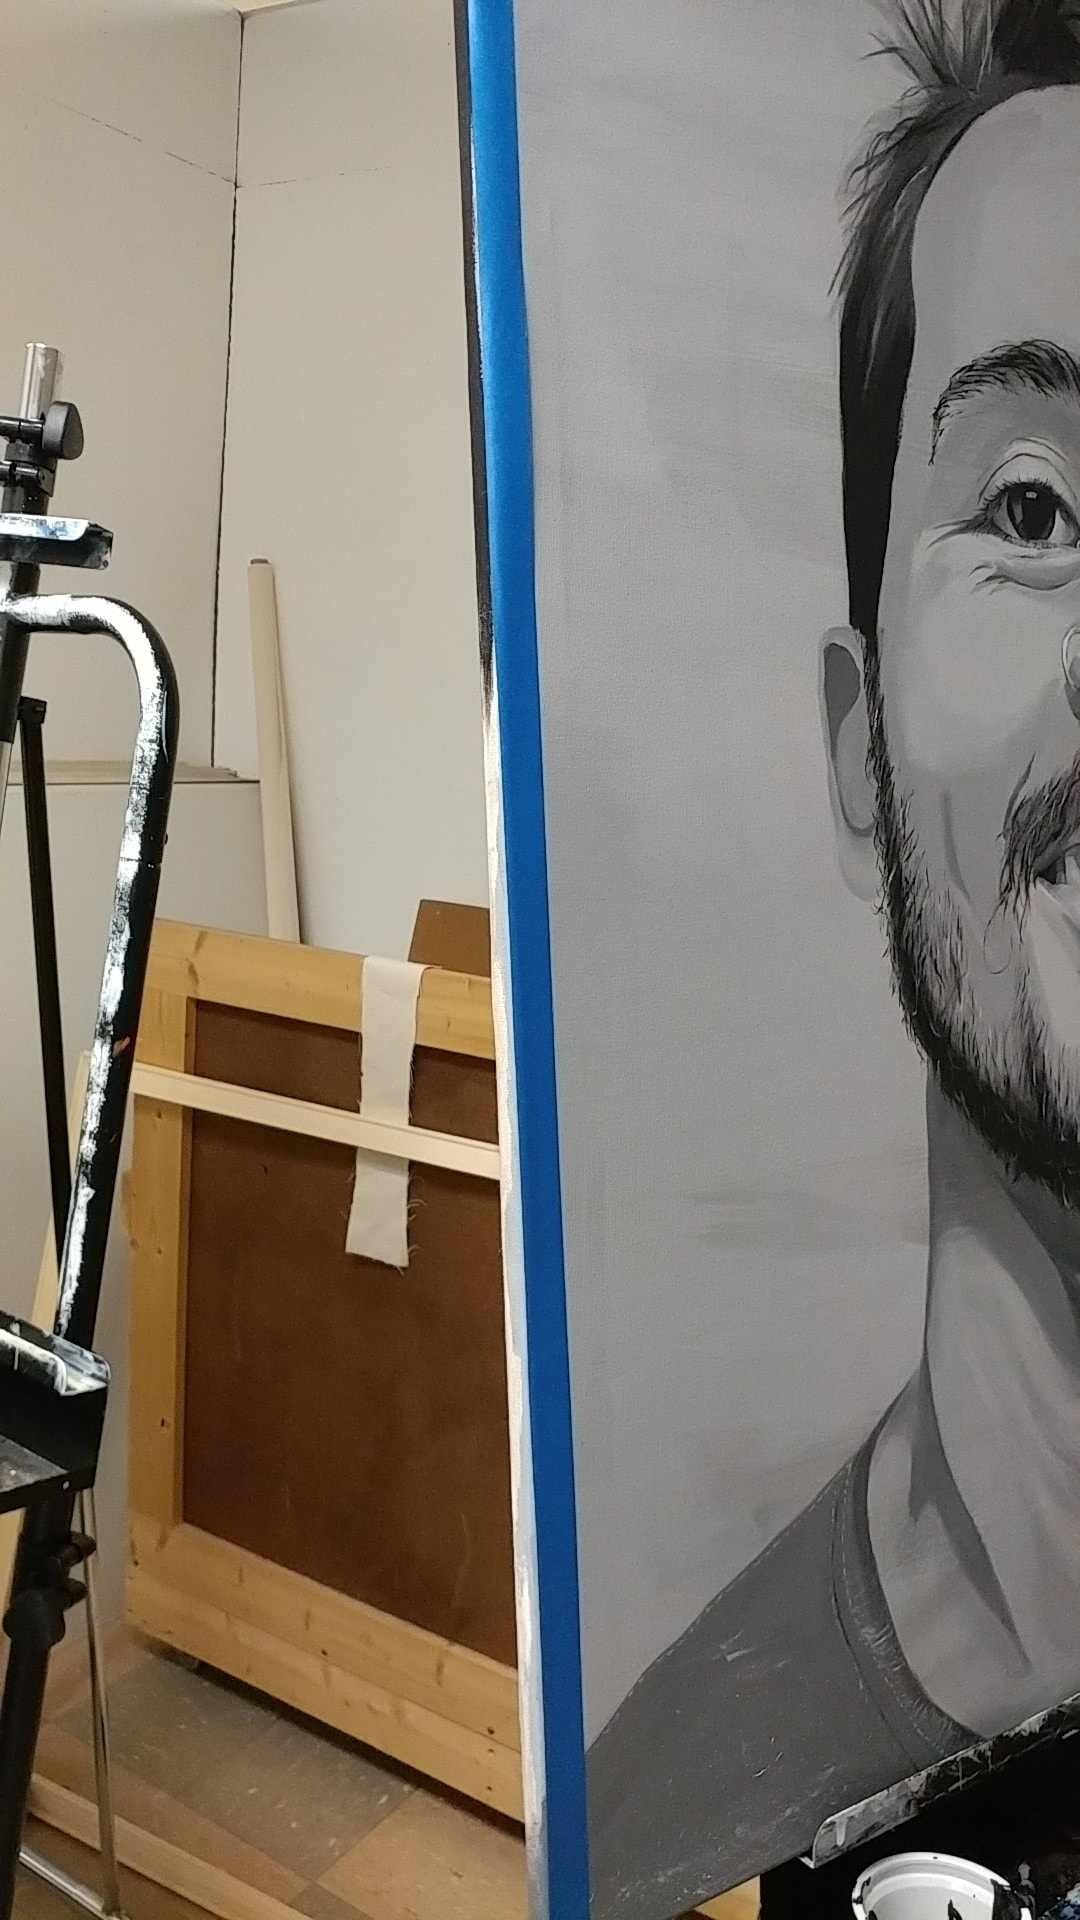
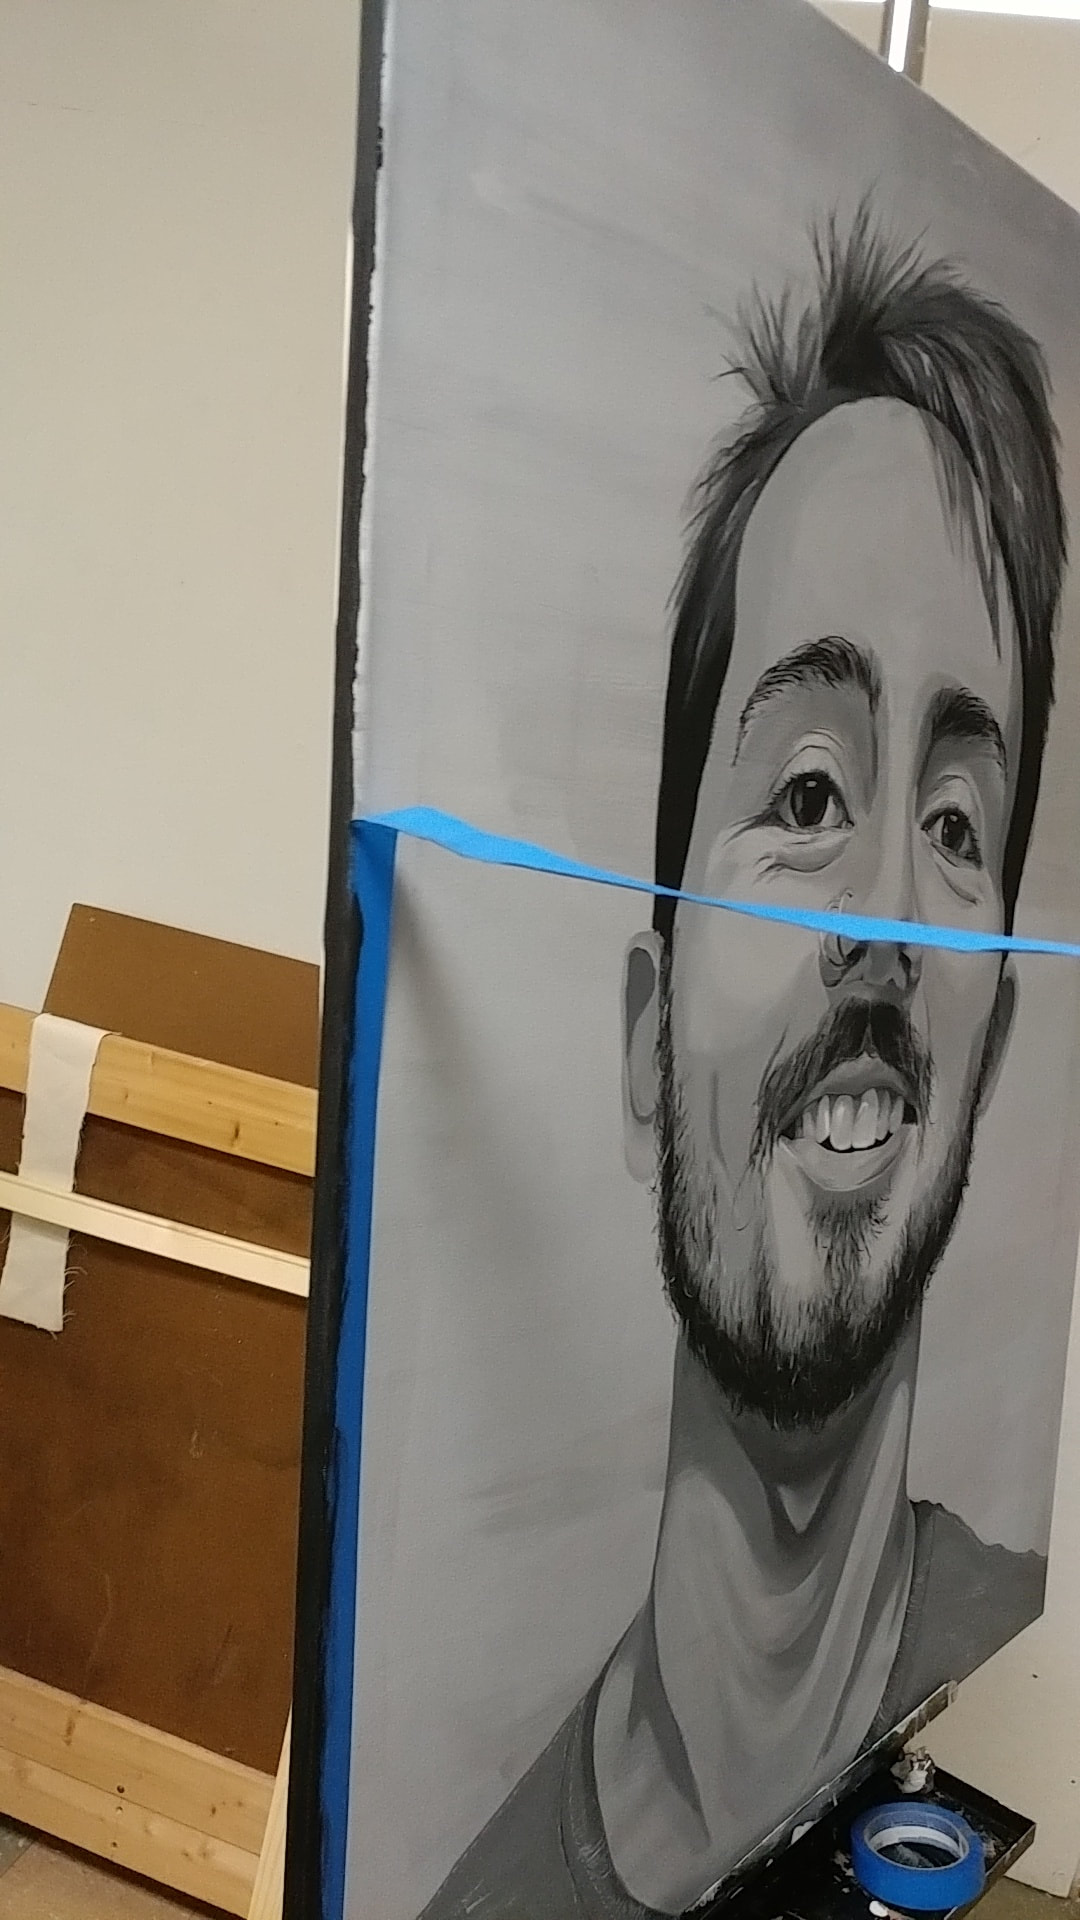
Gabriell Suarez del Real is a simple but highly detailed self portrait, inspired by the photo-realistic paintings of Chuck Close. The use of details help make the piece more realistic and engaging. The black and white monochromatic theme plays along with the almost obvious flaws. The flaws that would be considered to make someone "unattractive" or "not beautiful" like the messy and frizzy out of place hair, the thin and uneven eyebrows, not perfectly straight teeth, and even the sloppy/irregular facial hair. These are all flaws that Close would continue to throw out in the wide open to bring attention to and show natural beauty in his subjects even with all the flaws.
Inspirational Artist/Work
--- Chuck Thomas Close ---
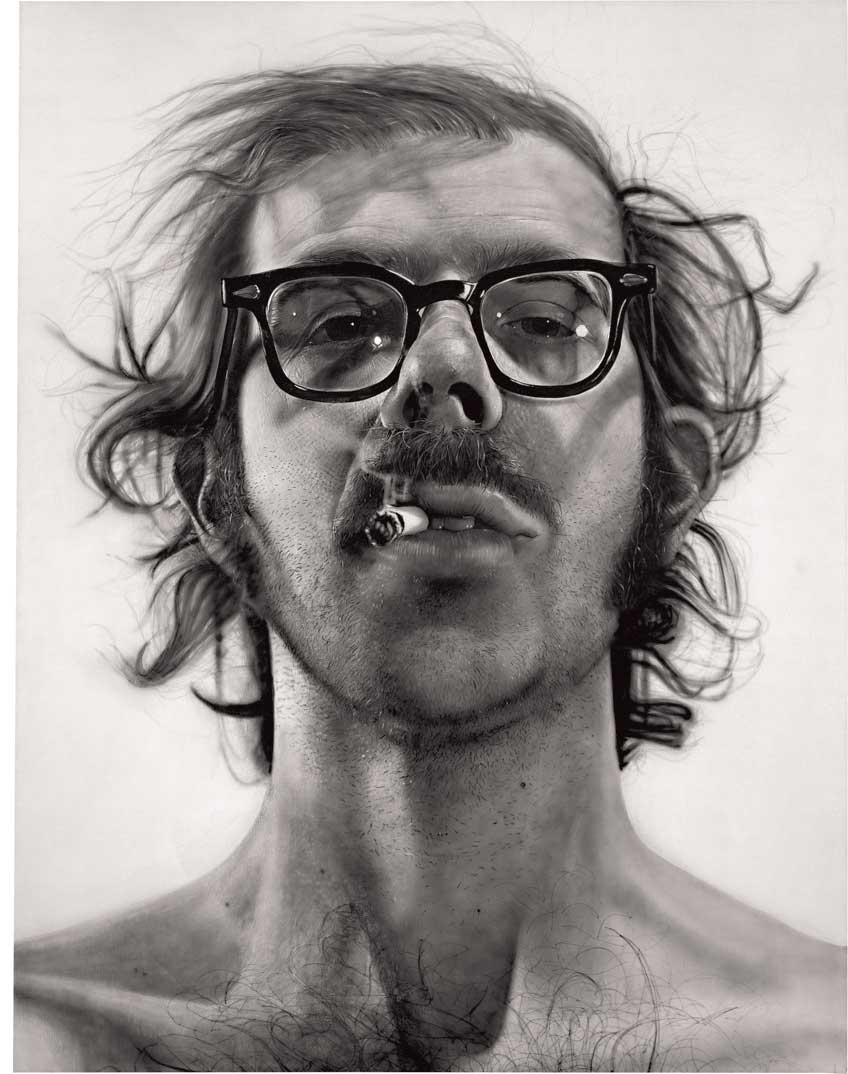
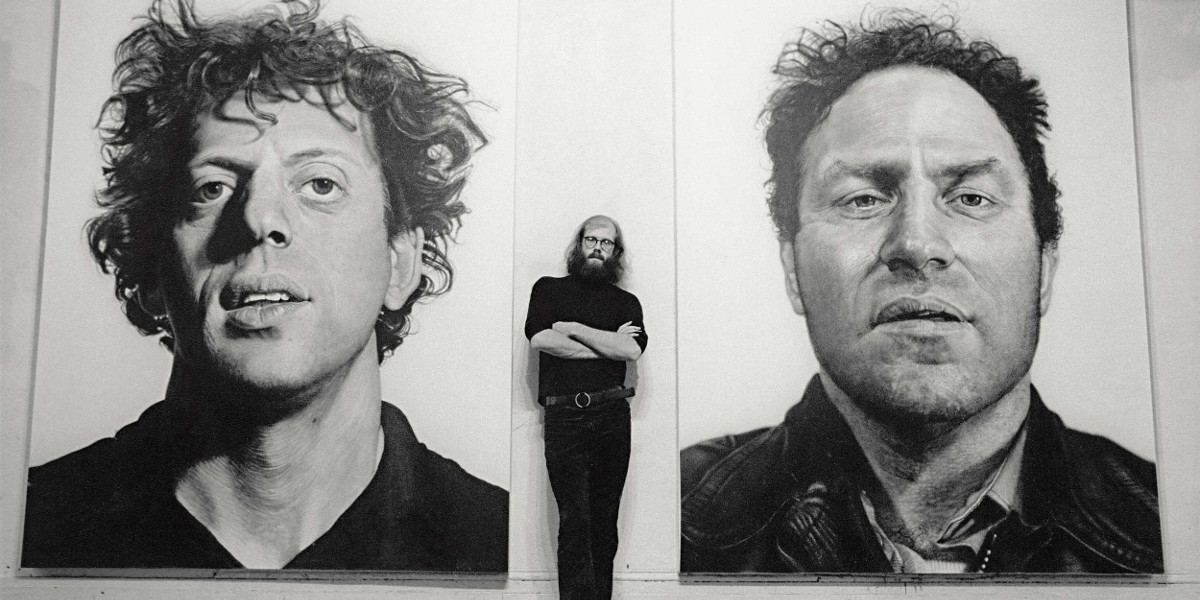
Born in Monroe, Washington, Chuck Close is a master of detail. Making paintings look exactly like a photo is exactly what made him such a well known artist. What makes his portraits so photo-realistic is the fact that he doesn’t try to glorify anything and pays strong attention to every little detail. Chuck close does not try to make an image look pretty with amazing colors or perfect angles, he paints what’s there and nothing more, he shows the realism with the details and black-white theme throughout his work.
Brainstorming
Process/Experimentation


* Pre-Painting Stage *
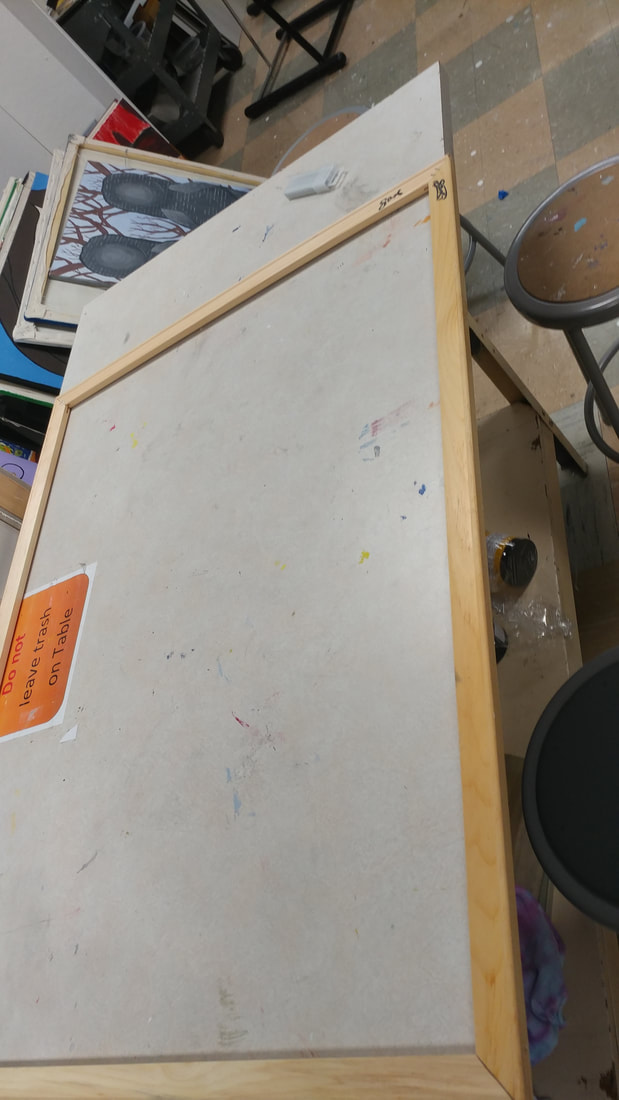
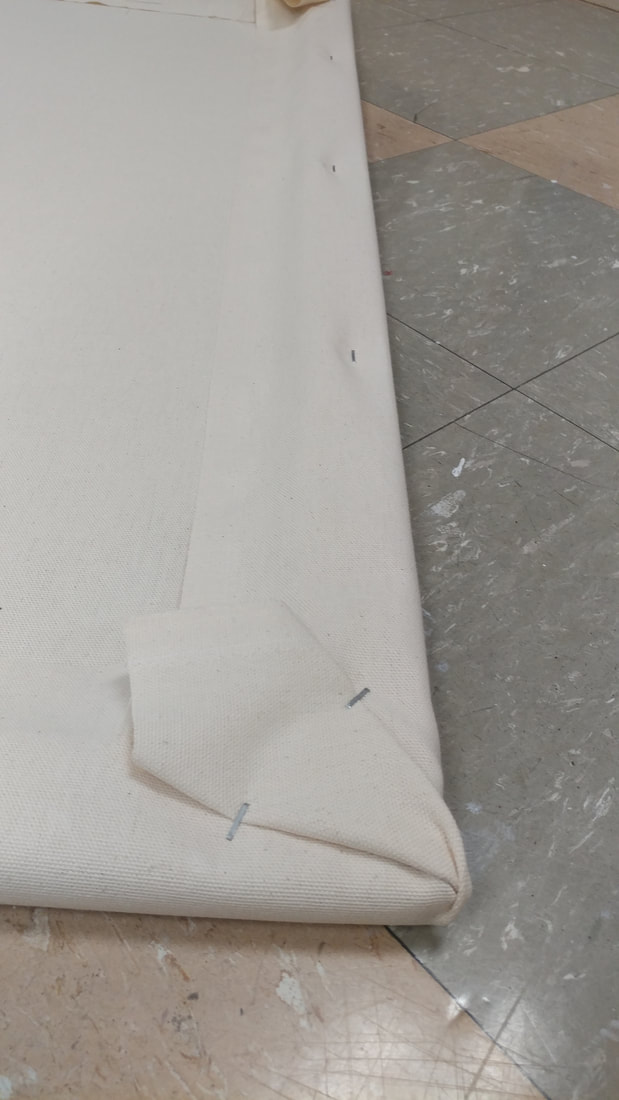
- Building the Canvas- Making the canvas was probably the most important step in the whole process for obvious reasons.
- Making the Frame- I used two four-foot pieces along with two three-foot pieces to make a 3ft x 4ft frame. I stapled the frames pieces together after sliding them into place to keep it stiff and prevent it from falling apart.
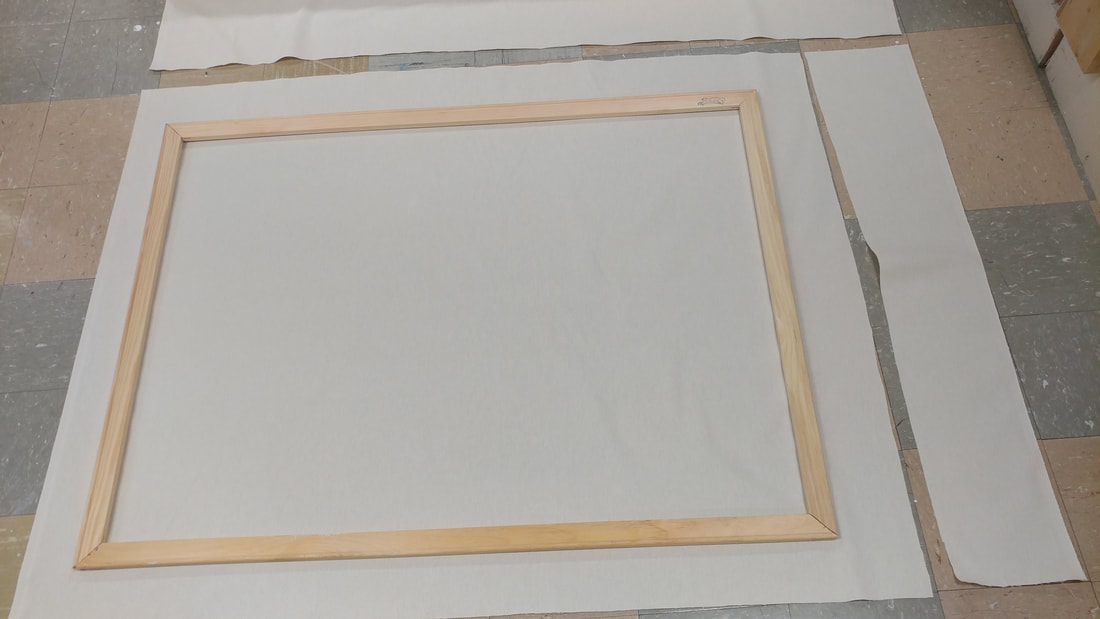
- Cutting the Canvas- I layed the frame along the canvas roll to cut out enough to fold over the edges evenly.
- Stapling the Canvas- I then stapled the canvas to the frame to keep it in place and complete the canvas making process.
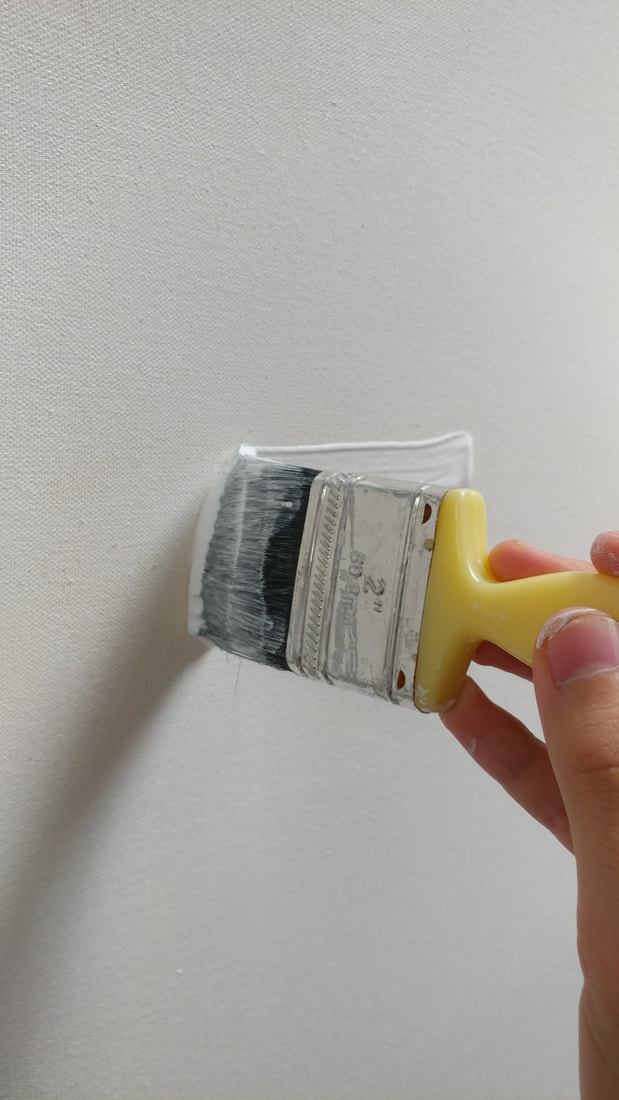
- Applying the Geso- I did not want the paint to seep through the canvas, and I also wanted a good base to apply the paint onto. So I added two even coats of geso on the canvas which also helped to tighten the cloth and make it a lot less floppy.
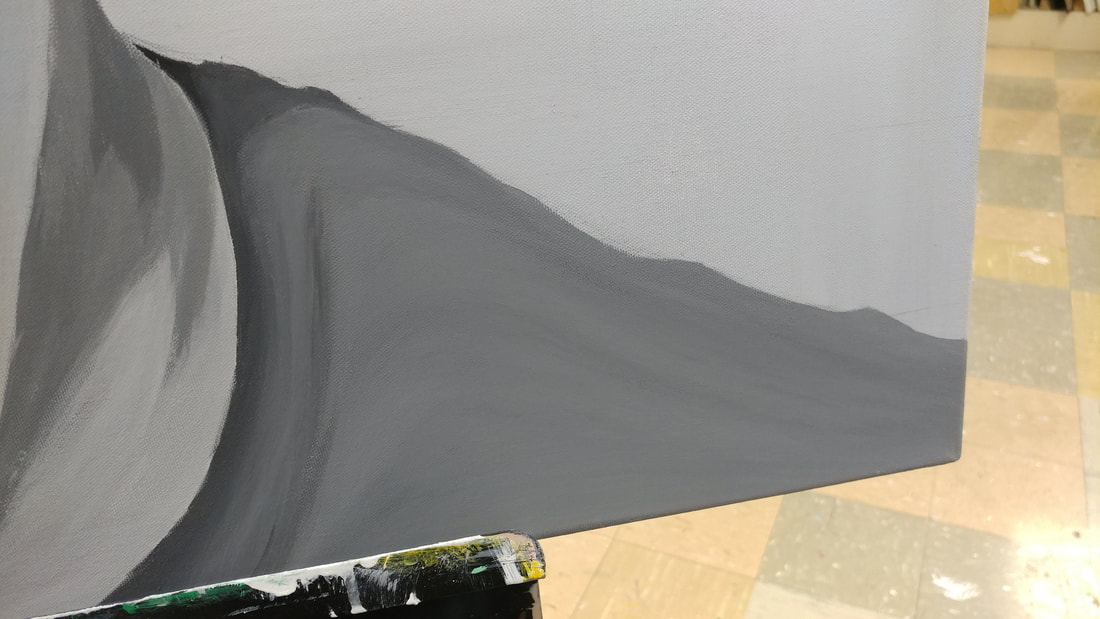
- Laying Down the Background- Normally I would add the background after I drawn out the image, but because the background was a light gray color I felt it would be smarter of me to draw the grid on afterwards. I used a mixture of white and black paint to lay down the background.
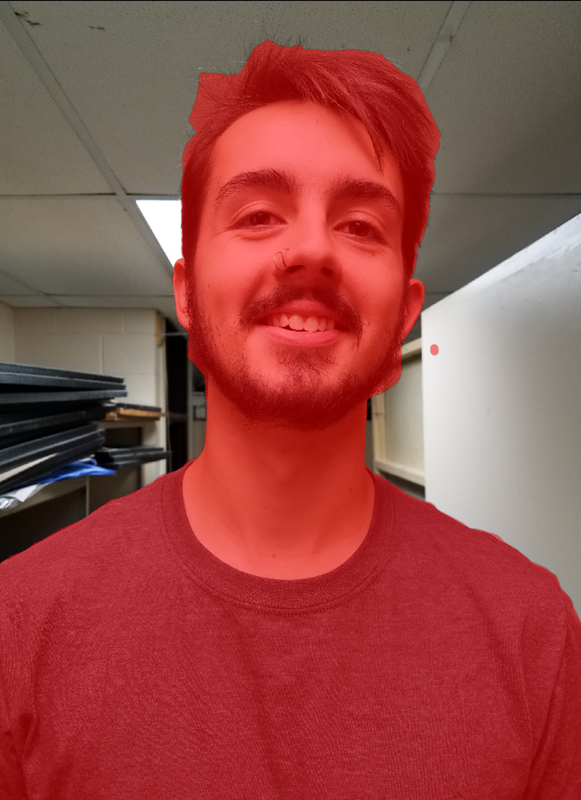
- Taking the Photo- I originally experimented with the lighting and different facial expressions to take a picture but I found no success with the lighting. I wanted to have a few dramatic shadows as Chuck Close does in his pieces. I came up with the idea to stand on a stool and practically have the light directly above my head.
- Cutting out the Subject- I used an app on my phone, PicsArt to cut out my face and separate the subject from the background so I could apply my own.
- Finding a Black and White Look- I played around with the brightness and contrast along with black and white filters to really achieve the dramatic shadows I was looking for. Eventually I came to peace with the image and moved on.
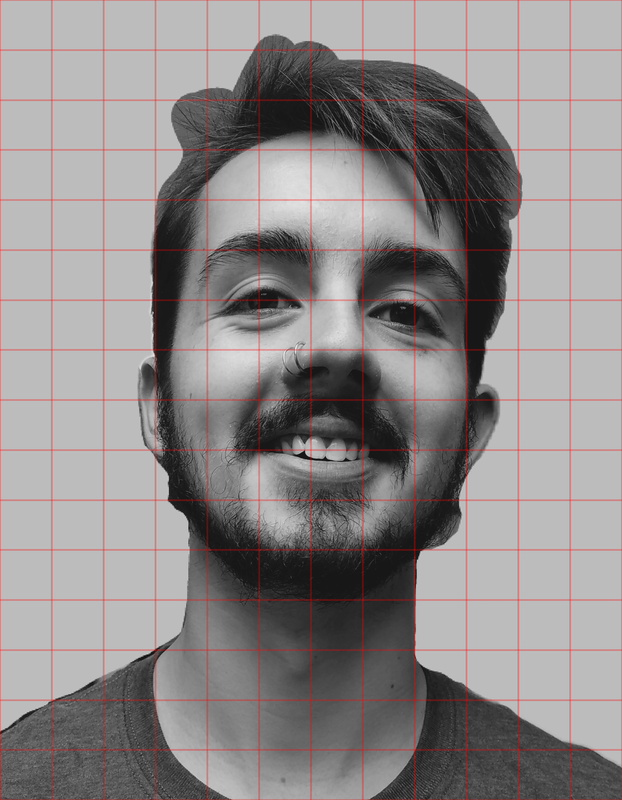
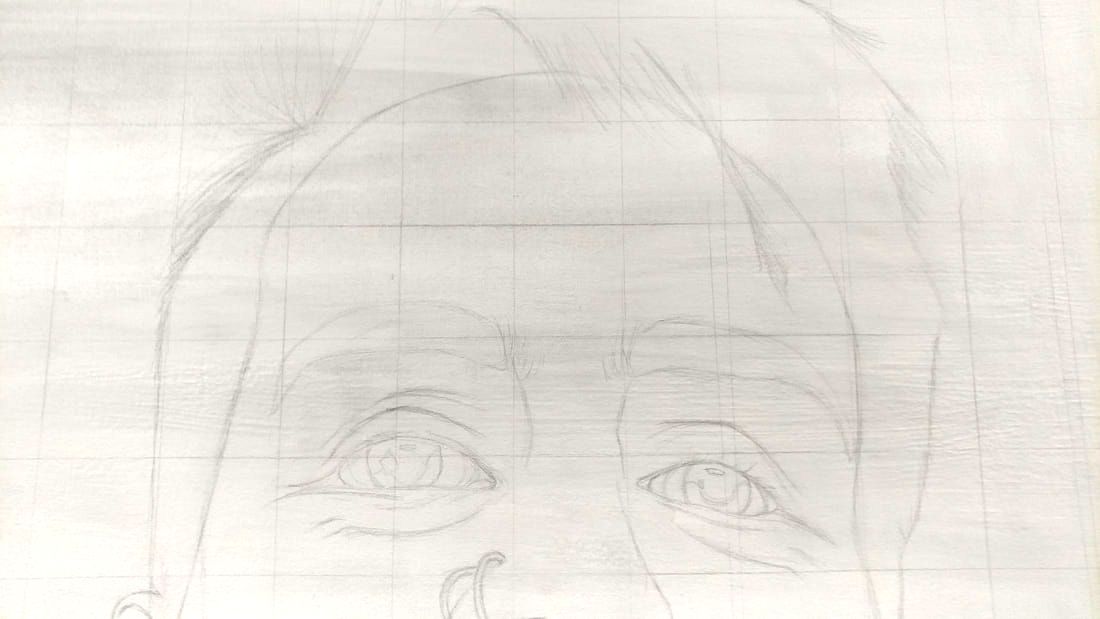
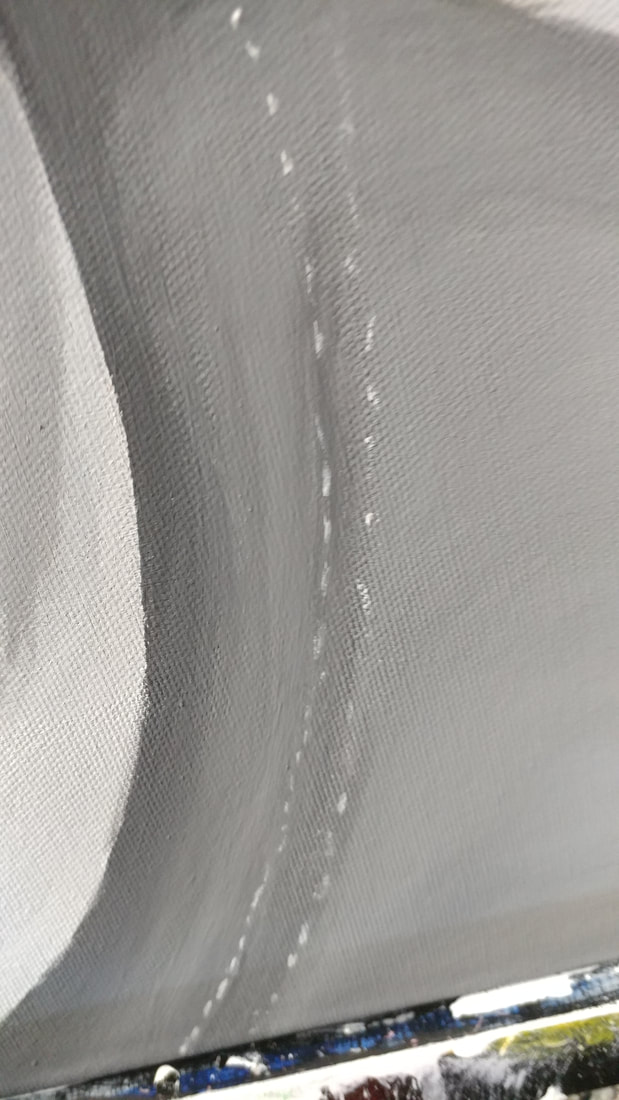
- Editing the Grid- I knew I wanted the individual squares to be about 3in x 3in so that they weren't too small or too big but still allowed me to draw out as much details as I would need with as much accuracy as I would need. So knowing that my canvas was 3ft x 4ft, I divided twelve by three which would give me four squares per foot. I then multiplied four by four and four by three. I used these answers to add my grid to the image I had.
- Drawing the Grid- After I had the grid on the image, I just had to put it onto the canvas. I did this just simply using a pencil and ruler.
- Sketching the Image- Drawing the image with the grid was time consuming but definitely worth it as it really helps me create an easy outline for the paint.

* Painting Stage *
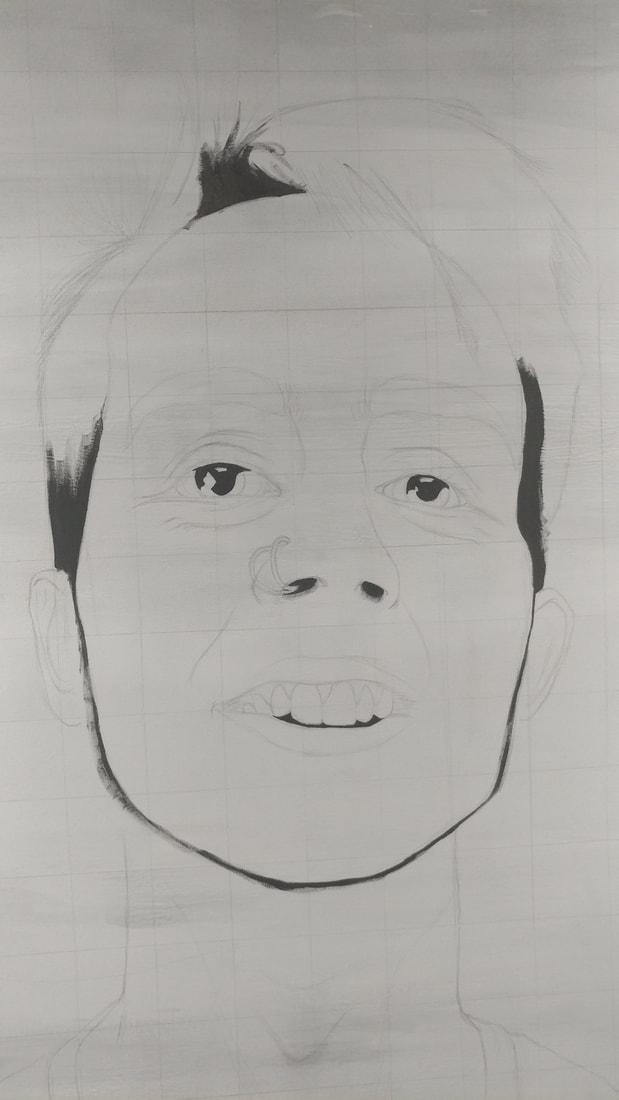
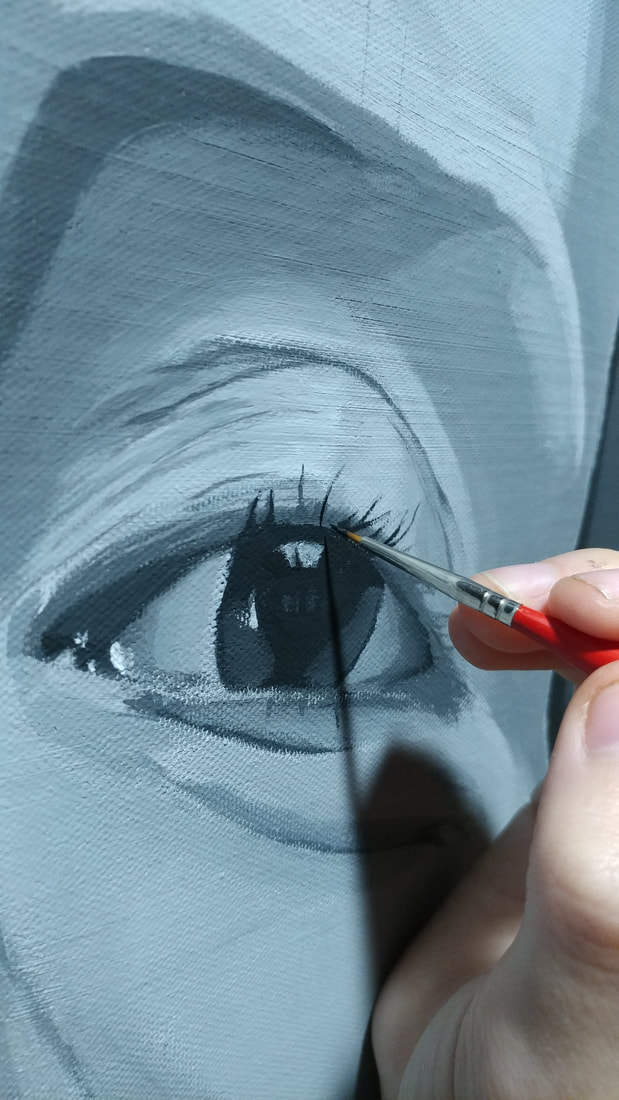
- Adding the Blacks- As I knew the painting process would involve me having to start with the shadows and transition into the highlights, I knewthe first and easiest step would be to start adding solid black to the areas is would be in (of course using the photo as reference).
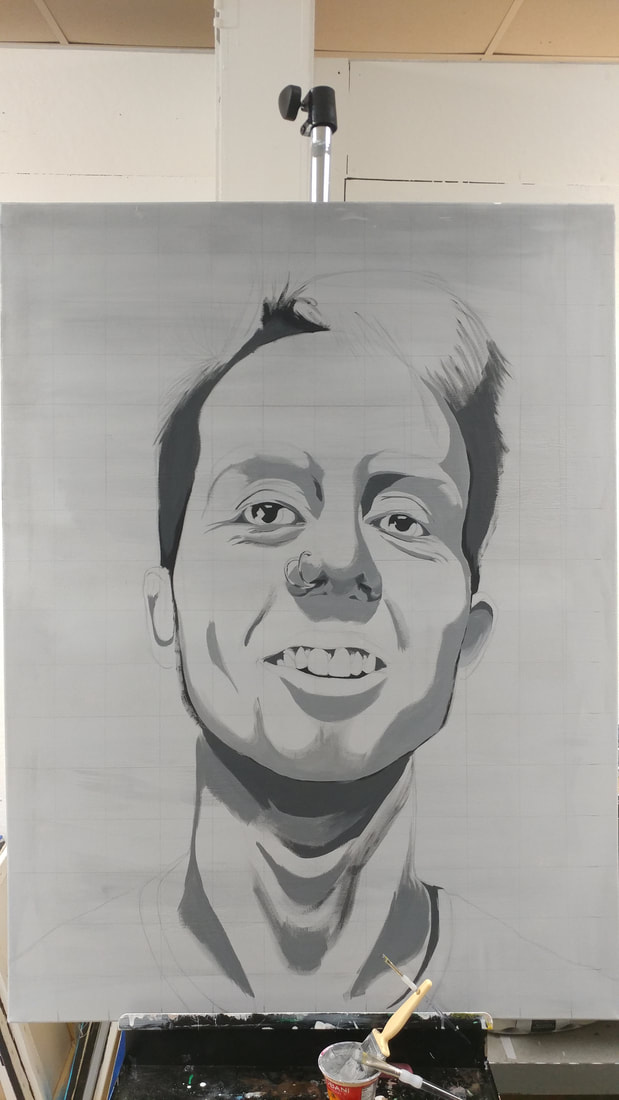
- Transitioning into the Highlights- I then continued to use the reference photo and slowly cover areas from darker grey to almost white. I used the same paint from the previous area but then added a bit of white for the next area.
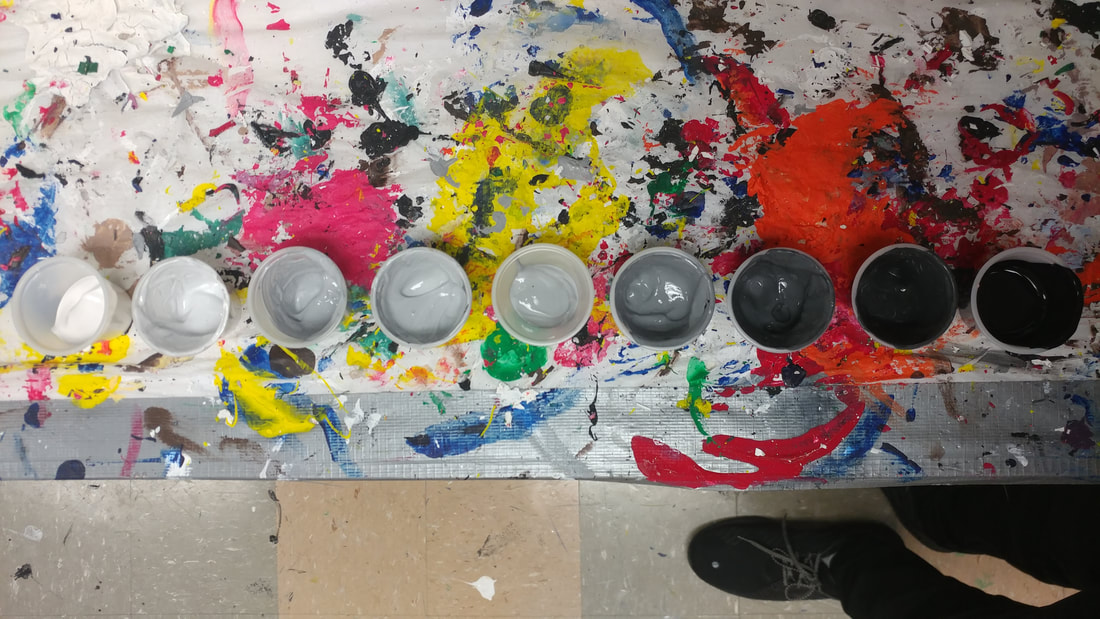
- Taking a New Approach- I started to find out that step 2 was not working out so great because it really limited my blending capability. By the time I moved on to the next area the previous area was already dry. Obviously this could have been fixed by going out and buying oil paints instead of acrylics, but I came up with a different solution and found it to be much more appealing to my style. I used several different small containers and created a gradient of grays from straight white all the way to straight black. This allowed me to save the same exact shades while also being able to switch between the shades quickly which helped a huge amount with my blending capability.
- Focusing on One Area- As I used the previously mixed shades, I decided to focus on one area at a time and strongly work on the blending for that one area. This helped me an extreme amount to get closer to the realism.
- Painting the Hairs Individually- TO really help get the accuracy I wanted, I used a very small tip brush and slowly painting the hairs individually. I used this process to add the eyelashes, eyebrows, and the facial hair.
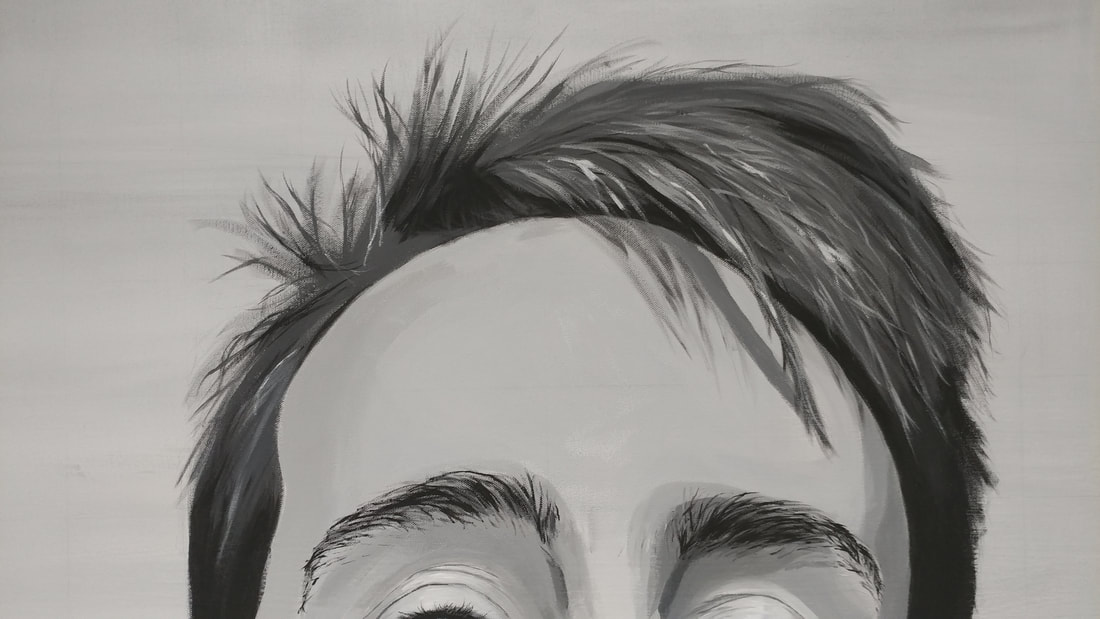
- Getting Longer Strokes- For the hair on the top of the head I used the same process as step 5 although I had to have much longer hairs so I used a larger brush and gently painting in the direction of the hair. I also used the smaller brush again to help get the loose/shorter strands.
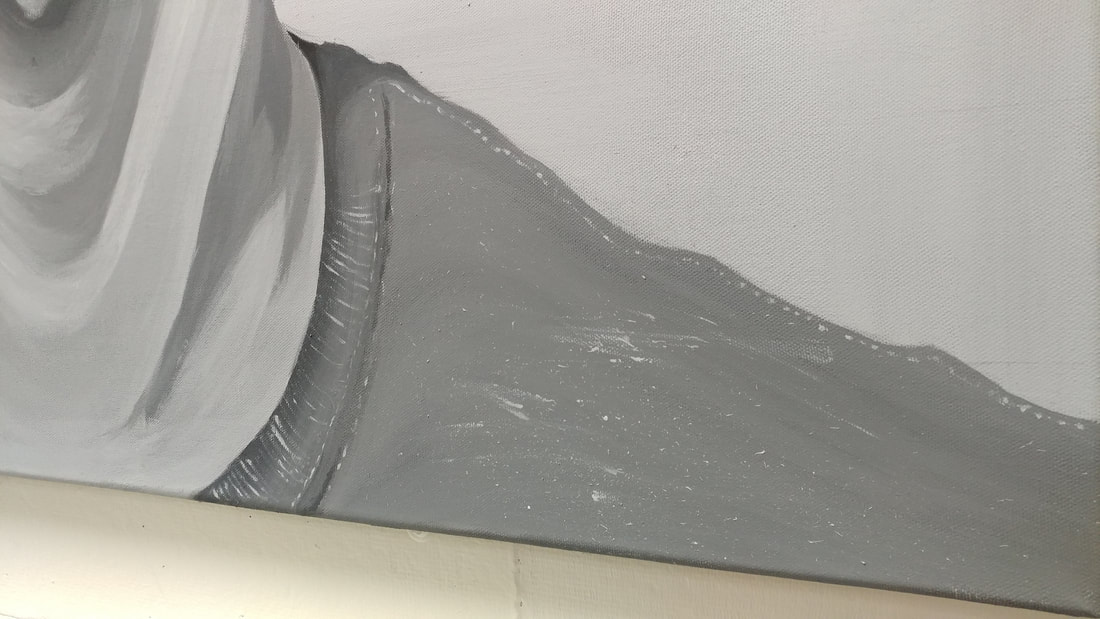
- Base Coat- For the shirt I began with adding a simple base color with shadows. This sets the value for the shirt.
- Getting the Smaller Details- I used a small tipped brush to paint all of the individual seams on the shirt along the edges and collar which really helped give it shape in a way and a small amount of texture. To really help with the texture and depth of the shirt I used a small amount of paint on a very stiff brush and slid my finger across the bristles to add a very slight splatter affect and create the material for the shirt.
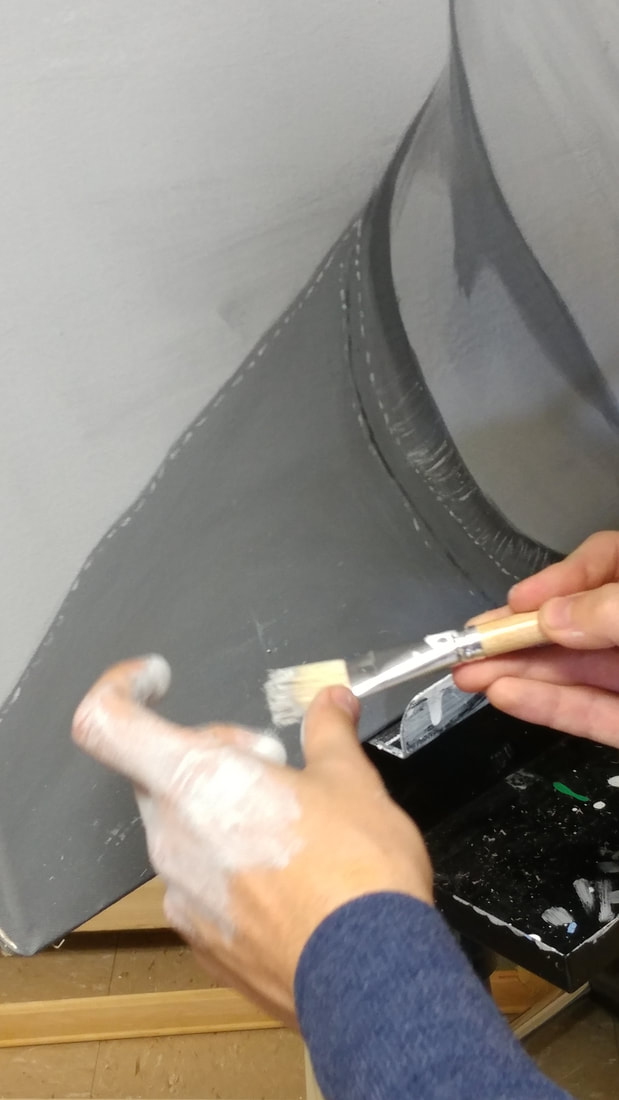
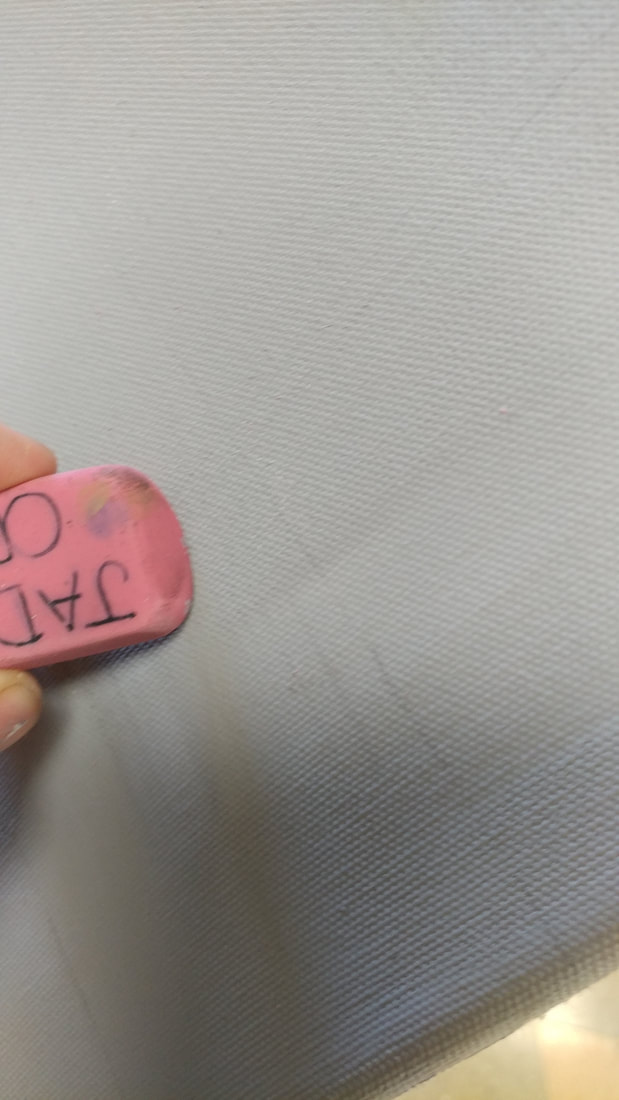
- Erasing the Grid Lines- Finally the last step was to erase the pencil-made grid lines and have the background by itself.
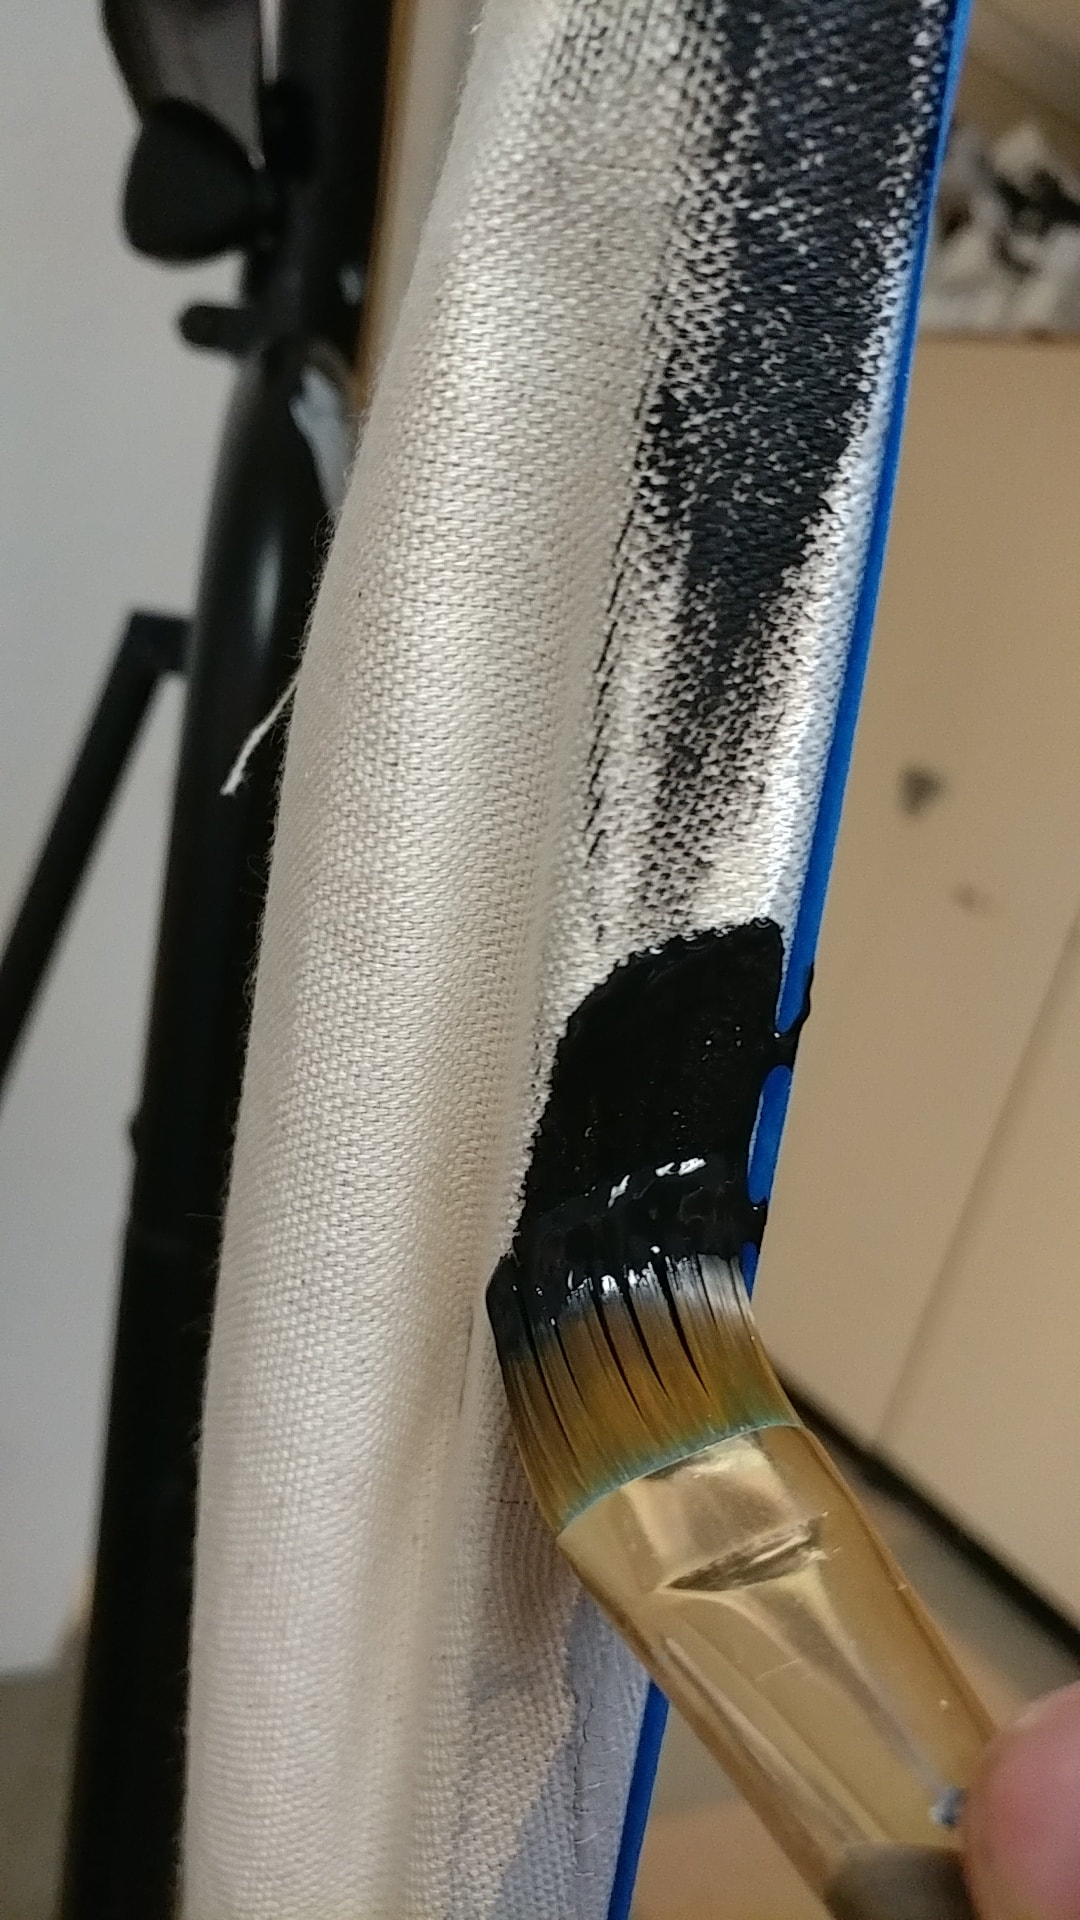
- Painting the Edges- I used tape to create an edge along the sides of the paintings so I would have an even line and not risk getting black paint on the background of the piece. After I painted it completely black along the edges I removed the tape and repeated the process for all four sides.
Reflection
In Chuck's work he has a very strong and obvious sense of "flaws" within his subject that would be considered "not pretty/good looking", in my piece I feel that the flaws I put in could have been a lot more obvious and better showcased. I also did not use strong blending and texturizing skills that could have improved the piece a significant amount. Another change to the piece that would've improved it as well would be a change in the pose or facial expression I made in the picture, I feel I should have made a more relaxed and care-free look or anything but a smile. Although, I do feel that I did well with an obvious connection to the inspirational artist as in when you look at my piece you are very easily able to see the resemblance the Chuck's older work. You can see this by the obvious monochromatic color scheme of black and white, the amount of detail in the piece also helps resemble his work.
ACT Connections
- Clearly explain how you are able to identify the cause-effect relationship between your inspiration and its effect upon your artwork.
- What is the overall approach the author has regarding the topic of your inspiration?
- What kind of generalizations and conclusions have you discovered about people, ideas, cultures, etc. while you researched your inspiration?
- What was the central idea or theme around your inspirational research?
- What kind of inferences did you make while reading your research?
